Woodworking is a timeless craft that allows individuals to unleash their creativity while building practical and beautiful items from scratch. If you’re new to woodworking, diving into your first project can be both exciting and intimidating. However, with the right guidance and a willingness to learn, you can embark on a fulfilling journey of creating handmade masterpieces.
In this guide, we’ll explore a selection of easy woodworking projects tailored specifically for beginners. From a simple bookshelf to a classic picture frame, these projects will introduce you to essential woodworking techniques while providing a satisfying sense of accomplishment.
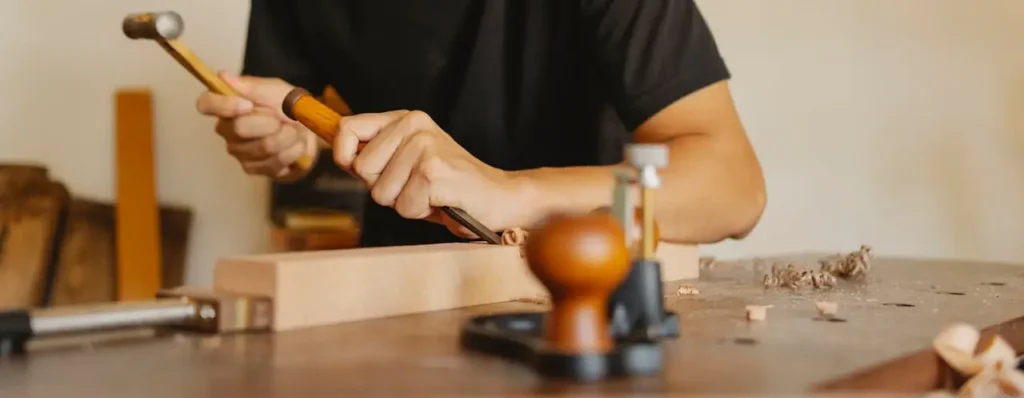
Getting Started: Essential Tools and Safety Tips
Before we delve into our projects, let’s review the essential tools you’ll need to have on hand:
Measuring and Marking Tools: A tape measure, combination square, and pencil are essential for accurate measurements and layout.
Saw: A handsaw or circular saw will be necessary for cutting your wood to size. Consider investing in a miter saw for precise angle cuts.
Drill and Drill Bits: A power drill is indispensable for drilling holes and driving screws.
Sanding Tools: Sandpaper or a power sander will help you achieve smooth surfaces and remove any rough edges.
Wood Glue and Clamps: Wood glue is essential for joining pieces together, while clamps will hold them in place while the glue dries.
Safety Gear: Always prioritize safety by wearing protective gear such as safety glasses and hearing protection when operating power tools.
With your tools at the ready and safety precautions in place, let’s dive into our beginner-friendly woodworking projects.
Project 1: Simple Bookshelf
A bookshelf is a practical and versatile woodworking project that’s perfect for beginners. Here’s a straightforward design to get you started:
Gather Your Materials: You’ll need wood boards cut to your desired dimensions for the shelves and sides of the bookshelf, as well as screws, wood glue, and finishing nails.
Assemble the Frame: Begin by attaching the sides of the bookshelf to the shelves using wood glue and screws. Ensure the shelves are evenly spaced and level.
Add Backing: To stabilize the bookshelf and provide support for your books, attach a piece of plywood or hardboard to the back of the frame using finishing nails.
Sand and Finish: Once the structure is assembled, sand the surfaces smooth to remove any rough spots. Apply a wood finish or paint of your choice to enhance the appearance and protect the wood.
Display Your Books: Once the finish is dry, your bookshelf is ready to display your favorite literary treasures.
Project 2: Classic Picture Frame
Creating your own picture frames allows you to showcase your cherished memories in a personalized and stylish way. Here’s how to make a simple wooden picture frame:
Cut Your Frame Pieces: Using a miter saw or handsaw, cut four pieces of wood to the desired dimensions for your frame—two for the vertical sides and two for the horizontal top and bottom.
Join the Corners: Use a miter saw to cut 45-degree angles at each end of the frame pieces. Apply wood glue to the mitered edges and join them together to form a square or rectangular frame.
Secure the Joints: Once the glue has dried, reinforce the frame joints by driving finishing nails or screws through the sides of the frame.
Add a Backing and Glass: Cut a piece of cardboard or hardboard to fit the back of the frame and secure it in place with small nails or staples. Insert a piece of glass or acrylic to protect your picture.
Finish and Hang: Sand the frame smooth and apply a wood finish or paint of your choice. Once the finish is dry, insert your picture into the frame and hang it proudly on your wall.
Project 3: Rustic Wooden Coasters
Wooden coasters are a quick and easy woodworking project that adds a touch of rustic charm to your home decor. Here’s how to make your own:
Select Your Wood: Choose a hardwood such as oak, maple, or cherry for durability and aesthetics. Cut the wood into small squares or circles using a saw.
Sand the Edges: Use sandpaper to smooth the edges of each coaster and remove any splinters or rough spots.
Add Decorative Touches: Get creative with your coasters by adding decorative elements such as wood burning, stenciling, or painting. Seal the coasters with a clear finish to protect the wood.
Attach Cork Backing: To prevent your coasters from scratching surfaces, attach self-adhesive cork backing to the bottom of each coaster.
Enjoy Your Handiwork: Once the finish is dry, your custom wooden coasters are ready to use. Enjoy a cup of coffee or tea with friends while admiring your handiwork.
Woodworking is a rewarding hobby that allows you to unleash your creativity and create tangible objects with your own two hands. With the right tools, materials, and a willingness to learn, even beginners can tackle a variety of woodworking projects with confidence. Whether you’re building a bookshelf, crafting a picture frame, or making rustic coasters, each project offers an opportunity to develop your skills and express your unique style. So roll up your sleeves, grab your tools, and let the sawdust fly as you embark on your woodworking journey!